
Setting up Outbound IVR calls is pretty easy. The only challenging part may be getting the data from the CIS - the mechanism is different for each billing system. We're happy to help walk you through that part.
To begin:
- Log in to the Payment System as an Admin
- Go to Settings > More > Features > Outbound IVR > More

3. Click Create a New Job

4. 
This is where you will determine who you want to call. Most of the time, a file will need to be created from the Utility Billing software that contains a list of accounts/phone numbers based on the objective of the call: Aging Report, Total Account List, Shutoff list, etc.
There is a sample file available to emulate as well as instructions for formatting. The system will accept a .csv or .txt format.
The only requirement for the input file is the phone number. The header for the phone number must be “PhoneNumber”. The headings / field names must be labeled precisely in order for the system to dynamically personalize the message. The following are fields that can be pulled into the call:
- RecipientName
- ServiceAccountNumber
- DollarAmount1 (this can represent the total amount due)
- DollarAmount2 (this can represent a past due amount, for example)
- Date1 (this can represent a due date)
- Date2
5. Simply choose the location of your file and upload it:
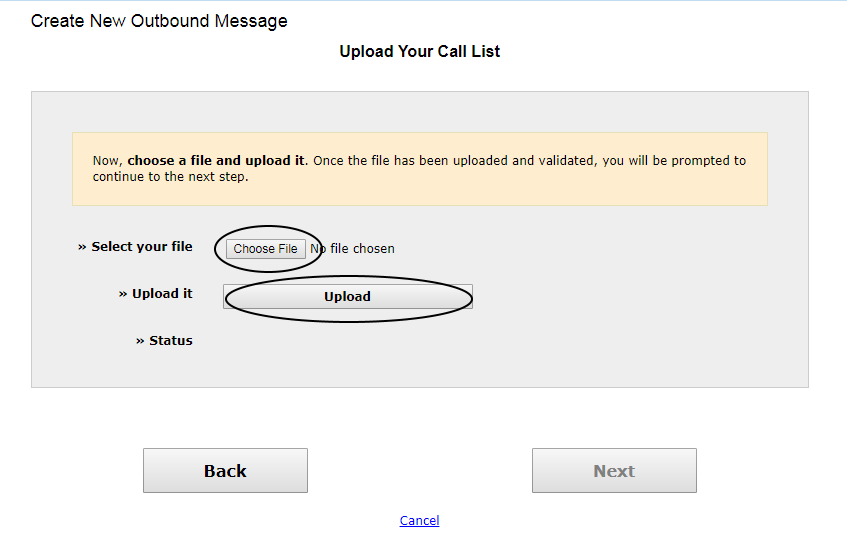
If there is an error in the file, the system will tell you - examples of errors:
- If a phone number is missing
- If a field for an account is blank, the field will not be pulled in for personalization. For example, if a DollarAmount1 is missing on row 5, the dollar amount will not be accessible for the phone call.
- If a phone number is formatting incorrectly
- If the file has incorrect delimiters
Once you have successfully uploaded your file, click Next to proceed:

6. You have the ability to schedule this call for the current time (within a 15 minute window) or schedule for a future time, such as after office hours.

7. You also have the ability to set up the number of times you want the system to retry calling a customer who does not answer on the first attempt. You can choose not to retry at all, retry once during the following hour or up to three times in a three hour span. This ensures that for any emergency / urgent notification you’ve done your due diligence to notify the customer.

8. When leaving a message on an answering machine or voicemail, the message can get cut off. We have built in some logic based on our provider’s programmatic assumption of machine detection that will either pause the outgoing message in order to determine whether a human or machine picked up OR you can turn the detection off and the message will simply repeat two times.

9. Now the fun begins - this is where you can customize your message based on the input file that you uploaded.

Based on the headers provided in the input file, you can easily add custom content to your message. Just click on the blue links when inserting customer names, your Utility name, the amount due and even a date, if it is provided. You can then listen to your message by clicking the Test button and entering in your phone number. This will ensure that the message is how you’d like it to sound before sending it to your customers.
10. You can save your job by the scenario of the call or just use the default job name.

Scheduled Jobs will appear in descending order by date with the creation detail:

Once the calls have been made, the job will change status to Past Job. You can click on Past Jobs to see the details. You will find all past jobs in descending order with details available. These details will provide a breakdown of the status of each call:

The look up the details of each call status, just click on the Download link for an Excel file. The file will provide the Phone Number, Timestamp, Name (if provided on input file), Provider Status (completed, unknown, busy, etc), Provider ID (a key that can be used for further support with the provider), Voice (based on original setup, male or female) and the content of the call.
Congratulations! You have successfully notified your customers of a very important message. Please contact us at support@transactionwarehouse.zendesk.com
Comments
0 comments
Article is closed for comments.